![Navix Logo - Purple-1.png]](https://hs.navix.io/hs-fs/hubfs/Navix%20Logo%20-%20Purple-1.png?height=50&name=Navix%20Logo%20-%20Purple-1.png)
If you upload invoices to a customer portal by hand, you can ask Navix to automate it. The New Portal Request form collects what our team needs to build an automated workflow that follows the same steps you use today.
This article covers each section of the form, what to enter, and what happens after you submit.
Before you start
Have these ready:
- The portal’s login URL, username and password
- A list of every customer you upload to this portal for, with their identifier and roughly how many invoices you upload each month
- Whether you check rates in the portal before uploading
- A screen recording of you uploading one invoice to the portal by hand
If you upload to more than one portal, please submit a separate request for each one.
Opening the form
Go to Portal Uploads or Portal Requests and click New Portal.
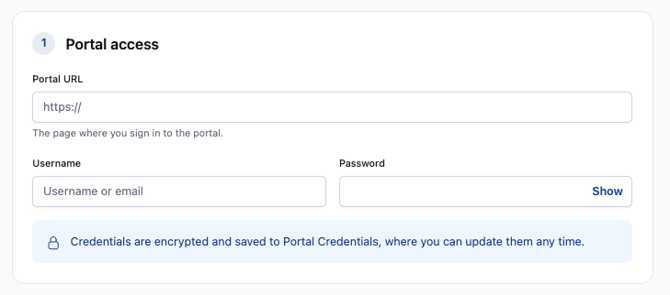
Section 1: Portal access
Portal URL: The page where you sign in to the portal, not the portal’s home page or a page you reach after logging in. It must start with https://.
Username: The username or email you use to sign in.
Password: The password for that account. Click Show to check what you typed.
Your credentials are encrypted and saved to Portal Credentials. You can update them there at any time. Most portals make you change passwords on a schedule, so update them in Portal Credentials whenever you change them in the portal. Credentials that have expired or are wrong will cause automated uploads to fail.
Section 2: Customers
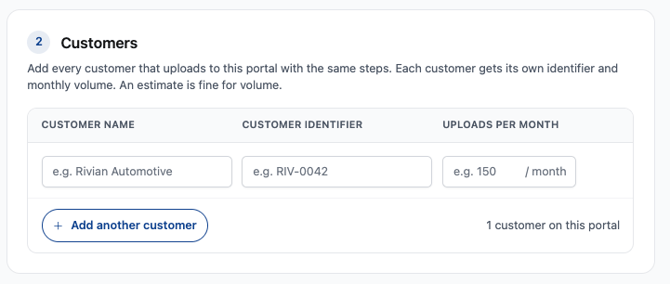
Add every customer you upload to this portal for, as long as you use the same steps for each one. For each customer, enter:
- Customer Name: The customer’s name
- Customer Identifier: The ID that customer uses in Navix
- Uploads per Month: About how many invoices you upload for this customer each month. An estimate is fine.
Click Add another customer to add more rows. The counter shows how many customers are on this portal.
If some customers on the same portal need different steps, tell us in the recording or contact support so we can set them up correctly.
Section 3: Workflow
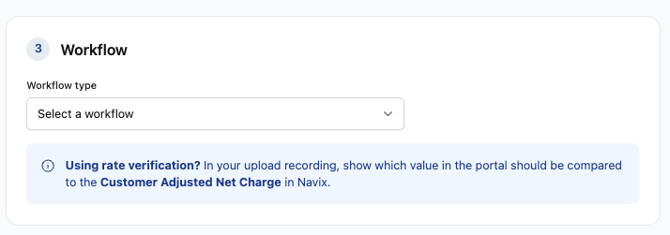
Choose the workflow type that matches what you do in the portal today:
- Upload only: You sign in, find the load, PO or shipment, and upload the invoice and its documents.
- Rate Verification + Upload: Before uploading, you compare a rate or amount shown in the portal against the invoice.
If you choose Rate Verification: In your recording, show which value in the portal should be compared to either another value in the portal or the Customer Adjusted Net Charge in Navix. If the amounts don’t match, the upload isn’t sent and shows up in Portal Uploads as a rate discrepancy for you to review.
Section 4: Upload recording
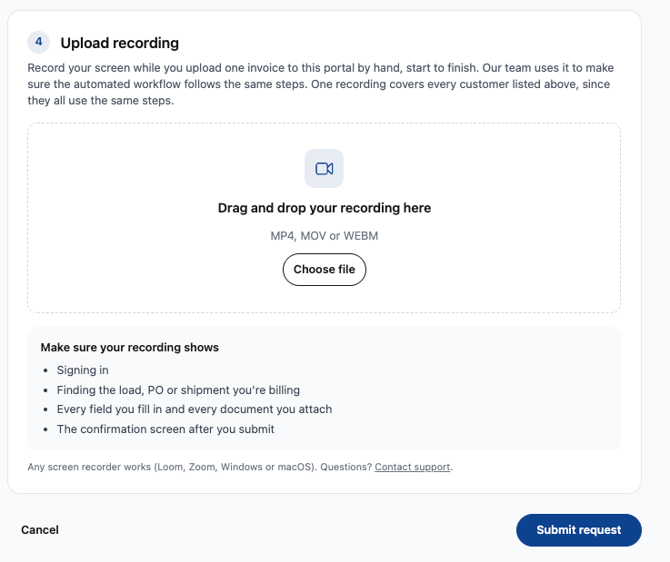
Record your screen while you upload one invoice to the portal by hand, start to finish. Our team uses it to make sure the automated workflow follows your exact steps. One recording covers every customer in Section 2, because they all use the same steps.
Your recording should show:
- Signing in
- Finding the load, PO or shipment you’re billing
- Every field you fill in and every document you attach
- The confirmation screen after you submit
Accepted formats: MP4, MOV or WEBM. Drag the file into the upload box or click Choose file.
Any screen recorder works, such as Loom, Zoom, or the built-in recorder in Windows or macOS.
Tips for a good recording:
- Go at a normal pace. Don’t skip steps or cut parts out.
- If you have to make a choice along the way (such as picking a dropdown value or a document type), say it out loud or pause on it so it’s clear.
- Use a real invoice so the screens look the way they do every day.
Submitting your request
Click Submit request. To leave without saving, click Cancel.
What happens next
- You submit the request. The portal shows as Pending setup in Portal Requests.
- Navix builds the workflow. We follow your recording step by step and will reach out if anything is unclear.
- Testing. We test uploads to the portal before going live. Keep uploading by hand during this time.
- Live. Once test uploads work consistently, we move all of your uploads for this portal to automation and let you know you can stop uploading by hand. Uploads then appear in Portal Uploads, and the request shows as Completed.
FAQs
Can I change my portal password after I submit?
Yes. Update it anytime in Portal Credentials.
I upload to the same portal for many customers. Do I need a recording for each one?
No. One recording covers every customer on the request, as long as you use the same steps for each.
When should I stop uploading by hand?
Only after Navix tells you the portal is live. Keep uploading by hand through testing.
Who do I contact with questions?
Click Contact support at the bottom of the form, or reach out to your Navix Customer Success contact.